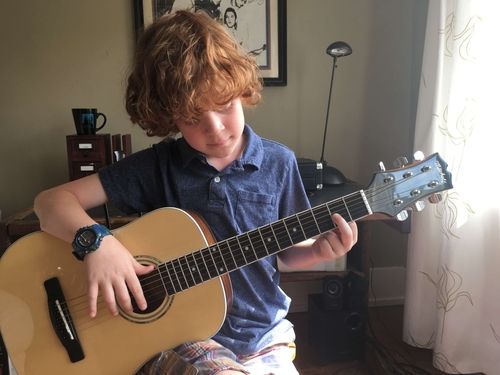
Lesson 1: Holding a Guitar While Walking the Dogs

PREVIOUS LESSON
X
On Lesson Day, go through all 7 sections of this lesson. That should take you about 20 minutes. Make sure to check out the "Practice Notes" tab on the right hand side of each lesson. That's where we give you tips and resources to give you confidence to run each session and keep it fun.

4 or 5 times this week return to this page and run through each exercise. Should take about 15 minutes per day.

Need Tips on Tuning Your Guitar or Making Practice Fun? Check out the blog!

1

1-2-3 Wave

NEXT

<-- Click Here

Click Here -->

Today you will meet your guitar! 

Think of it like a pet or favorite toy. It's important to hold it the right way.

Here’s how:
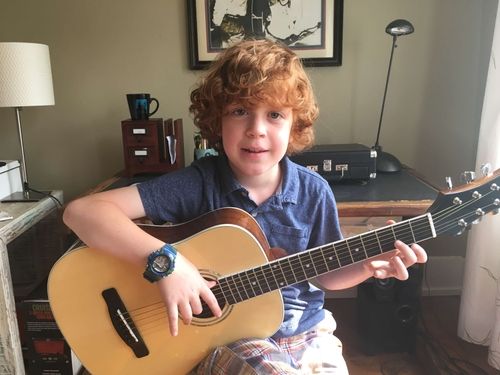
  • Sit on the edge of your chair.
  • The guitar will touch your body in three places : 
      1 - Your right thigh (the top of your leg)
      2 - Your chest (right by your heart)
      3 - Your arm (near your right elbow)
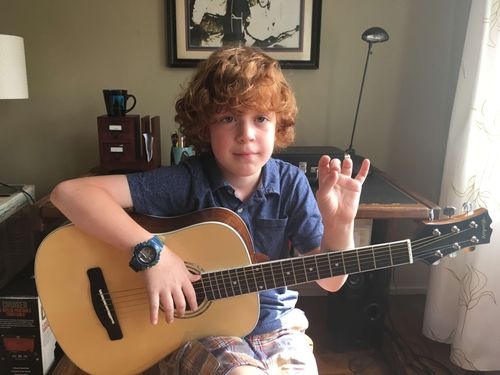
  • Now wave your left hand.

Watch the video below to see how its done!

Practice showing your grown-up how to 1-2-3-wave- then let them have a turn!

P
R
A
C
T
I
C
E

N
O
T
E
S

Set Up

Chairs should not have wheels or arms and should allow the student to place both feet comfortably on the floor. Raising the right leg with a small footstool (four to six inches tall) under the right foot will keep the student from resting their left arm on their thigh later on. Before starting, you will need to have the G string and the B string tuned. You can find a video on how to tune the guitar in the Resources.

What to Watch For

The weight of the right arm will cause the head of the guitar to point up at a 45° angle and the guitar neck to angle slightly, which is natural and good. While the weight of the right arm helps hold the guitar, it is important to not hunch or lean over the guitar. The student’s back should remain straight. If you find they are hunching, ask them to “grow an inch”.

How to Practice

Developing a consistent routine is key and the 1-2-3-wave exercise is a great place to start. Not only is it fun to do, the left hand wave is very important because it ensures that the left hand will be free to move when playing. Great technique takes time, so don’t worry if it doesn’t look perfect today. As long as the guitar is secure and the left hand is free to move, your student is on the right track.

Holding the Guitar

There are a few different ways to hold the guitar. Our method has the guitar resting on the right leg. In classical playing position the guitar will rest on an elevated left leg, but it will not be discussed in this book. We also do not cover using a strap to hold the guitar while standing. Instead, we opt for a very secure seated position.

2

Walk the Dogs

NEXT

Now that you can hold your guitar, let’s make some noise!
  • Put your thumb on the top string.
  • Pretend you fingers are dogs.
  • Walk the dogs across the tops of the strings-don’t be afraid to get a BIG sound!
  • Keep your thumb on the top string—it’s the leash.
  • Put your fingers flat on the strings to stop the sound.
  • Then walk the dogs again!

P
R
A
C
T
I
C
E

N
O
T
E
S

The Rest Stroke

The “Walk the Dogs” exercise is an introduction to what guitarists call the rest stroke. Kids often make a lot of noise in the first part of this exercise—that’s a good thing. Be sure to compliment their big, beautiful sound. It is important for beginners to not be afraid to make a big sound, even if it doesn’t quite sound like music yet. Laying the palm of your hand across the strings will stop the noise.

No Choke
Chain

As your student walks the dogs make sure that their fingers are not wrapping around the string, creating a snapping sound.
The finger is underneath the string. This will lead to a snapping sound. We call this the choke chain. Instead, the finger should stay above the string.

The thumb should stay anchored on the top string (the E string) while the rest of the fingers walk across the other strings. This provides balance and consistency for beginning students. Eventually, the thumb will be needed to play, but for now keep it on the top string.

Independent
Dogs

During this exercise, most children will experiment with using four fingers (index, pointer, ring, pinky) at the same time. Explain that you want to see the dogs (their fingers) walking all by themselves. This is an exercise you can practice anywhere by placing your thumb on the table or your thigh and then moving your fingers in a moonwalk-like motion.

Other
Sounds

There are a lot of ways to produce a sound on the guitar. The rest stroke is a relatively easy stroke that allows the student to produce a controlled sound. It is also very tactile, which is great for kids. Other methods of plucking the strings using both the fingers and the pick are discussed in later books.

3

Pep-per-o-ni Piz-za

NEXT

Let’s make some music... and Pizza!
  • Put your thumb on the top string.
  • Find the G String (Three up from the bottom).
  • Walk your pointer finger over the G string and let it rest on the string above.
  • Make the string say “Pep-per-o-ni Piz-za.

P
R
A
C
T
I
C
E

N
O
T
E
S


The G string is the third string from the bottom.

You should alternate between your pointer and middle fingers to pluck it.

The pep-per-o-ni notes are twice as fast as the piz-za notes (think short-short-short-short-long-long or  ….—— ). Try to keep the tempo (speed) even and focus on only playing the G string.

Don’t worry if it is not perfect right away. The student will probably pluck the wrong strings a few times, praise their effort and remind them to try to only play the G string.

As they play keep an eye out for the following:

Thumb
Position

The thumb should stay anchored to the top string.

Choke
Chain

The fingers doing the plucking should not wrap around the string and snap it, the fingers should move over the tops of the string.

Independent
Fingers

The fingers should move independly.


There is a lot of muscle coordination and development going on here, so don’t worry too much if things seem a little awkward at first. Keep orienting back to the key points above and know that it will get better with practice.

4

The B String

OK, let's try it on the B-String!
  • Put your thumb on the top string.
  • Find the B string (two up from the bottom, right below the G).
  • Walk your two fingers over the the B string, letting them rest on the G string.
  • Make the string say “Pep-per-o-ni Piz-za.

P
R
A
C
T
I
C
E

N
O
T
E
S

The B string is the second string from the bottom, right below the G string. Students should use their pointer finger and middle finger for this exercise. After plucking the B string the finger should come to a stop and rest on the G string.

Again, the pep-per-o-ni notes are twice as fast as the piz-za notes. The eventual goal is to play the rhythm confidently while only plucking the B string, but remember, it will take practice to get the hang of it.

The most challenging part of this exercise is developing the habit of resting the finger on the string above after plucking it. You might find that you have to put your hand next to the student to demonstrate the action.

Once the student can play the rhythm, they can try playing the rhythm on the G string and then the B string like so:


Use the play-along recording below to practice playing open G then open B. Don't worry about the order, or if you or your child match the recording perfectly. The goal is to have fun and get used to playing the open strings. Things will naturally get better with time.
5

Fret Time

NEXT

Now that you can play the G and B strings with your right hand, let’s learn what the other hand does.
With your left hand, make a circle with your middle finger and thumb.
Swing your left hand underneath the neck of the guitar. Put your thumb on back of the neck and your middle finger on the 2nd metal bar down from the top- this is a fret!
Slide your middle finger behind the fret and push the string down until it is firmly pinching into the neck, just behind the fret.
Try plucking the G String while you're pushing down on the string. See how you get a different sound!?

Try plucking the string with your right hand while you're pressing on it with your left hand. And then again while you are not pressing on it.

You're playing different notes on the same string!

P
R
A
C
T
I
C
E

N
O
T
E
S

In order to use the left hand we need to learn the names of parts of the guitar.

Neck

The long skinny piece of wood that extends out to the left side of the guitar.

Fretboard

This is the front-side of the neck. It is the side with all of the metal bars on it.

Frets

The metal bars that run the length of the fretboard are called frets. By pushing down the string just behind (to the left of) the fret, we make the string shorter which makes the sound higher or lower. Guitarists call this fretting a note.
There are three steps to preparing to fret a note.

1. In the first step, the student makes a circle between the middle finger and the thumb. These two fingers should stay opposite one another when fretting notes. 

2. Next you swing the left hand underneath the guitar and put the thumb behind the neck and the other fingers on the fretboard. 

3. Finally you use the middle finger to press the string down just to the left of the fret.
It takes time to develop the strength and flexibility to fret notes well, so don’t worry if the student doesn’t get great sounds the first few times they practice fretting notes. The main things to watch for when practicing are:

Arch in the
Left Hand

Arches are strong which is why we start by making a circle with the left hand. Sometimes in order to press harder students will flatten or even bend back their thumb, but this will ultimately make it harder to play.

Finger Tip
On String

The string should make contact with the finger tip, not the pad or flat part of the finger.

Consistent
Pressure

Having consistent pressure between the finger and the fretboard is important to get a strong sustained sound.
All of this will take some time and muscle development, so fight the urge to over-instruct. If the fingers are round and the contact points look good, give the student time to grow and they will.

6

The Note A

NEXT

We just learned that pushing the string down behind the fret makes new notes.

Now we are going to play the note A!
  • Play the open G string (HINT: "Open" means without pressing down on the fret.)
  • Then press down the G string with your middle finger to the left of the second fret—this is the note A.
  • Practice playing G then A.
  • Now play A to G.
  • Be sure to keep your fingers pointed toward the guitar the whole time.

P
R
A
C
T
I
C
E

N
O
T
E
S

The
Note 'A'

By pressing down the G string at the second fret you get the note ‘A’. As you practice this try to lift the finger up as little as possible when playing the open string.

Left Hand
Technique

Keep looking for the three key points for the left hand:
  • The thumb is on the other side of the neck behind the middle finger with space between the neck and the palm of the hand.
  • The finger is pressing down close to the right hand side of the fret (if you are too far back to the left in the fret you will hear a buzzing sound). 
  • The string is contacted with the center of the tip of the finger.

Keep It
Close

The goal is to lift the finger up as little as possible when playing the open string. Young players tend to lift their finger very far off the string in order to be sure they aren’t touching it, which is inefficient. Many students find it helpful to think about lifting their finger straight up (with the fingers still pointing at the fretboard) rather than opening their hand with fingers pointing toward the ceiling.

7

Jelly

NEXT

So now you've got 3 notes: G, A, and B. Let's play a song!

(We call this one 'Jelly' because it's so sweet!)
Watch the video, then try playing it on your own.

If you can't play it perfect now, don't worry!
Try to play it smoothly.
Every time you play, you get a little better.

P
R
A
C
T
I
C
E

N
O
T
E
S

This is the first song your child will learn. In addition to playing the song as it is written, there are a few other fun ways to practice it:

Sections

Play one group of notes at a time e.g. G A B, then B A G, finally A A B A G.

Echo

Using the three sections take turns echoing each other, you play then they play.

Leap Frog

Using the three sections, take turns exchanging sections e.g. one plays G A B the other B A G, the first A A B A G.
The final phrase is fairly challenging and will take some time to master. Keep playing and encourage your child to play in time, without stopping, even if some of the notes don’t come out perfectly clear.

You can watch the video for practice or use the play-a-long below. The play-a-long features the song played three times. Initially, it may be very hard for your child to play along with it. This will get better over time. Remember, the goal is to have fun!
This lesson covers a lot, so it will take time to absorb everything. We will keep practicing the things we have learned in later lessons, so when you get this material about 80% mastered you are ready to move on to Lesson 2.
Learning to play an instrument takes time but that doesn't mean it can't be fun!

Our goal for today is to leave the instrument feeling happy, encouraged, and excited to play again tomorrow.

Contact

Mailing List

X
Thank you! Your submission has been received!
Oops! Something went wrong while submitting the form.
X
Thank you for signing up for the Awesome Guitar for Kids mailing list!
Oops! Something went wrong while submitting the form.